How do I Get Rid of Bats
- HDIGRO Team

- Feb 23
- 9 min read

How Do I Get Rid of Bats
Bats are amazing outdoors. In your attic? Not so much. If you’re here because you heard scratching at dusk, found little black pellets on insulation, or—worst case—spotted a bat flying in your living room, you’re not alone. The good news: you can solve this permanently without harming bats, damaging your home, or putting your family at risk.
The not-so-fun truth is this: most “bat repellents” fail, and the fastest way to create a nightmare is to seal the house up before you know exactly where bats are entering and whether babies are inside.
So here’s what we’re going to do instead:
Handle any rabies-risk situation safely.
Confirm whether you have a single bat incident or a colony.
Use humane exclusion (one-way exits) so bats leave on their own.
Seal the structure so they can’t come back.
And yes—there are shortcuts I’d love to give you. But in real-world wildlife work, shortcuts are how you end up with dead bats in walls, stains on ceilings, and a smell you can’t un-smell.
Let’s do it right.
First: safety (rabies + exposure) rules you shouldn’t ignore
Most bats are not rabid. But bat bites can be tiny and hard to notice, and public health guidance is very clear: if there’s any chance of exposure, treat it seriously.
Treat it as potential exposure if:
A bat was in a room with someone who was sleeping (adult, child, or anyone impaired).
A bat was near an unattended child, or someone who can’t reliably say whether they were bitten.
You touched a bat (even with a towel) or suspect a bite/scratch.
You ask... How do I get rid of bats inside your home?
Close interior doors to confine it to one room.
If safe, open a window and stand back (sometimes it exits on its own).
If there’s any exposure risk: don’t release it until you speak with your health department/animal control, because they may want it captured for rabies testing.
Health disclaimer: This guide is educational and not medical advice. If you suspect exposure, contact your local health department or a healthcare professional immediately.
If you’re in Northern Virginia, for example, Fairfax County specifically advises calling local animal protection/health resources for guidance.
Second: are you dealing with one bat… or a colony?
This matters because the solution changes.
Signs of a colony (attic/wall roost)
Bats exiting around dusk and returning near dawn
Guano (droppings) piling under rooflines, vents, or attic rafters
Ammonia-like odor (urine)
High-pitched chirping or squeaking in walls/attic
Brown/black rub marks around a small gap (body oils)
Signs of a single-bat incident
One bat appears in living space, no guano piles, no dusk exit activity.
Often caused by an open chimney flue, gaps at soffits, or a bat that got disoriented.
If it looks like a colony, keep reading—because the correct solution is exclusion, not repellent.
The “don’t do this” list (common mistakes that make bat problems worse)
In my experience, these are the mistakes that turn a manageable bat situation into a full-blown home disaster:
Sealing every hole before installing one-way exits This can trap bats inside (and they’ll search for a new exit—often into your living space). It can also trap pups during maternity season.
Using poison, glue traps, or lethal methods Aside from being inhumane, it can be illegal and creates rotting carcasses in walls—odor, flies, stains, and expensive remediation.
Relying on ultrasonic devices, mothballs, bright lights, or “essential oil bombs” These might move bats temporarily within the structure, but they rarely solve the entry problem.
Doing exclusion at the wrong time of year Many states publish “safe dates” to avoid trapping flightless pups. (Example: New Jersey lists specific exclusion windows.) Extension guidance also emphasizes timing and step-by-step sealing windows.
The only method that reliably works long-term: humane bat exclusion
Authoritative wildlife and conservation guidance consistently points to the same approach:
Identify the primary exits
Install one-way doors/valves so bats can leave but not re-enter
Seal all secondary gaps
After several nights, remove devices and seal the last openings
Why this works
Bats are loyal to roost sites. You’re not “scaring them off.” You’re changing the rules of the building so your attic is no longer an option.
Step-by-step: how to get rid of bats in an attic (DIY exclusion plan)
Step 1: check timing (don’t trap pups inside)
Before you start sealing anything, look up your state’s bat exclusion timing guidance (many wildlife agencies publish it), because exclusions are often discouraged or restricted during maternity season.
A practical example:
Some state guidance provides “safe dates” windows for exclusion to avoid harming pups.
Extension guidance explains seasons where you observe vs. install devices vs. final-seal.
If you’re unsure, this is one of the best reasons to call a licensed wildlife professional—because timing mistakes are costly.
Step 2: do a dusk watch (the pro move most homeowners skip)
Pick a calm evening. About 20 minutes before sunset:
Stand outside and watch rooflines, soffits, vents, chimney areas.
Look for bats slipping out of a gap (it can be as small as ½ inch).
Mark the exit points with painter’s tape or take photos.
Pro tip: Do this for 2 evenings. Weather can change bat activity, and you want confidence before you install devices. Guidance from building-exclusion resources emphasizes keeping one-way doors on long enough to ensure bats have left—especially if weather is stormy and bats stay inside.
Step 3: gather materials (what you’ll actually use)
Here’s a practical DIY kit list:
One-way bat exit device(s): tube, cone, or netting setup
High-quality exterior sealant + caulk gun Exterior Sealant / Caulk
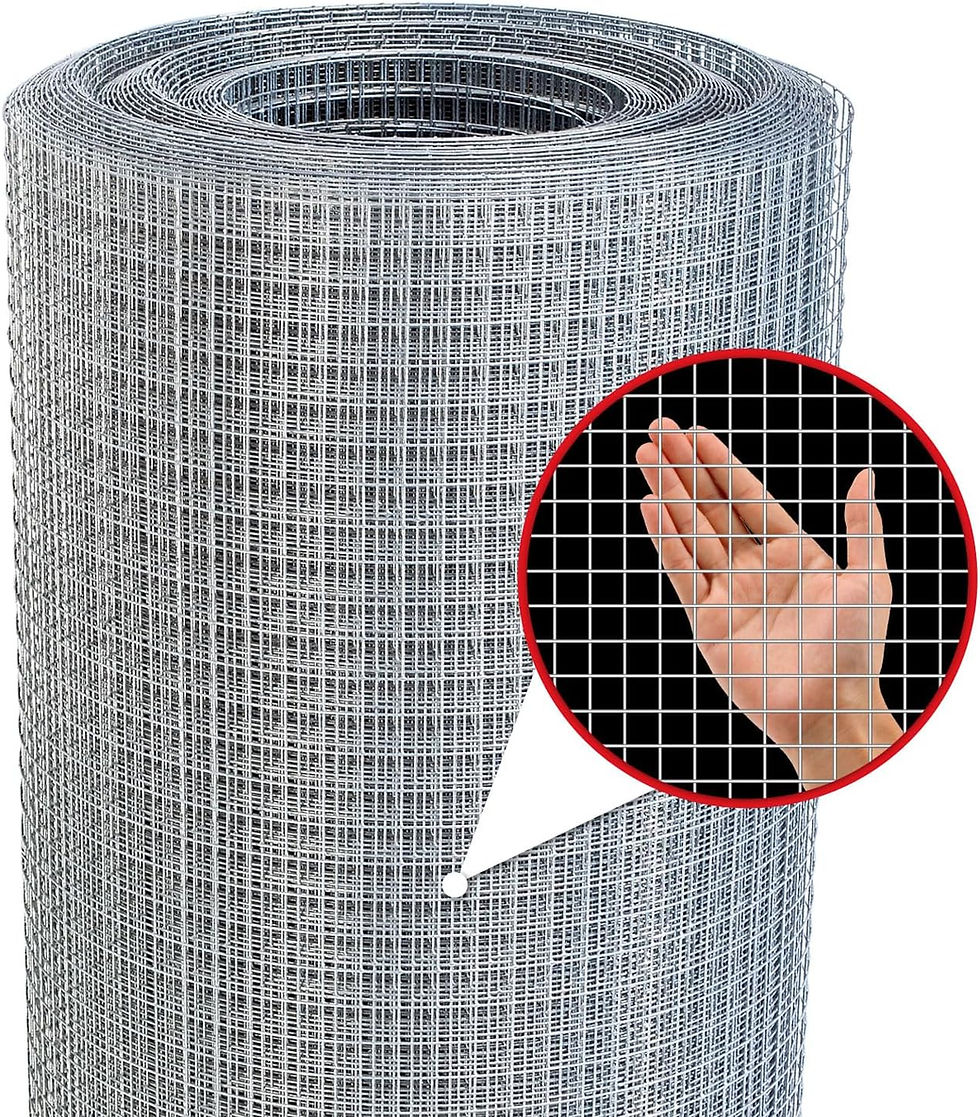
Hardware cloth / metal flashing (for bigger gaps)
Expanding foam (ONLY for non-heat, non-movement gaps and used carefully) Pest-Blocking Expanding Foam
PPE: gloves, eye protection, N95/P100 mask (guano dust is not your friend) P100 Respirator Mask

Headlamp + ladder safety gear
Safety disclaimer: If you’re working on a roof, ladder safety comes first. If access is high, steep, or unsafe, hire a pro.
Step 4: seal secondary holes FIRST (but leave main exits open)
This part is counterintuitive, but it matters.
You want bats to still have their usual way out.
You seal everything else so they can’t simply switch to a new crack once you install an excluder.
Focus on:
Loose soffits
Fascia gaps
Roofline intersections
Gable vents (often need screening)
Chimney gaps / flashing edges
Attic fan vents
Maryland DNR and other state guidance typically describe the exclusion process as using one-way doors and sealing openings to prevent re-entry.
Step 5: install one-way exits on the main openings
Install your exclusion tube/cone/netting directly over the active exit(s). Use the device instructions carefully—improper installation is why DIY exclusions fail.
Then let it run for multiple nights. A common guideline is 5–10 days depending on conditions, especially if weather reduces bat movement.
Step 6: confirm the bats are out
How you know it worked:
You stop seeing bats exit at dusk.
No new guano appears under exit points.
You don’t hear roost noise at night.
If you still see activity after a week, don’t panic—usually one of two things is happening:
You missed a secondary opening, or
Your device isn’t installed properly.
(Keep reading for troubleshooting.)
Step 7: remove the excluders and seal the last openings
Once you’re confident bats are out:
Remove the one-way device
Seal that final gap permanently
At this point, your bat problem should be “done,” not “gone for a week.”
DIY vs. hiring a bat professional (comparison table)
Decision point | DIY humane exclusion | Hire a pro (wildlife exclusion specialist) |
Typical cost | Lower materials cost | Higher upfront cost, often includes warranty |
Risk | Higher risk of missing gaps or wrong timing | Lower risk; pros spot entry points fast |
Safety | Ladder/roof + guano exposure risk | Safer for homeowners |
Effectiveness | High if done perfectly | Very high, usually best long-term |
Best for | Single-story, easy access, small colony | Multi-story roofs, complex rooflines, large colonies, maternity-season uncertainty |
Bat conservation guidance also notes that many states regulate exclusions and recommends checking local wildlife agency restrictions—another reason a licensed pro can be worth it.
Troubleshooting flow: “If you see this, do that”
If bats are in your living space repeatedly…
You likely have an entry path from attic/walls into interior.
Pause DIY sealing and prioritize identifying openings and professional assessment.
If anyone was sleeping with a bat in the room, follow CDC/public health guidance.
If you hear chirping/scratching in walls during the day…
Could be a maternity roost or a tight cavity colony.
Avoid exclusion during unsafe dates; consult wildlife agency guidance.
If you sealed a hole and now there’s a strong odor…
You may have trapped bats inside.
This is a “call a pro” moment—dead animals in walls can require targeted removal and remediation.
If guano is heavy and insulation looks contaminated…
Plan for cleanup after exclusion (see next section).
Wear PPE and avoid stirring dust. Guano can carry pathogens; don’t dry-sweep.
If the one-way device “worked”… then bats came back weeks later…
Almost always: one missed gap.
Do another dusk watch and re-check roofline seams and vents.
What about bat repellents? (Quick reality check)
You’ll see products claiming:
ultrasonic sound
strobe lights
peppermint oil
mothballs/ammonia
Here’s the blunt truth: repellents don’t solve entry points, and bats are persistent once they’ve chosen a roost. Humane exclusion is the method repeatedly recommended by bat and wildlife resources.
If you want to spend money where it counts, spend it on:
a reliable exclusion device
sealing materials
vent screens and hardware cloth
After bats are gone: cleanup, deodorizing, and prevention
Guano cleanup basics (do it safely)
Wear gloves + respirator (N95 minimum; P100 is better).
Lightly mist droppings to reduce dust.
Bag and remove droppings and contaminated insulation if needed.
Consider professional remediation for large accumulations.

Prevent them from coming back
Screen vents properly (don’t block airflow).
Repair soffits and fascia boards.
Install chimney caps and make sure flues close.
Keep attic access points tight and sealed.
“But are bats protected? Can I even remove them?”
Often, yes—bats are protected and exclusions can be regulated by timing and method, especially due to conservation concerns like white-nose syndrome impacts.
That doesn’t mean you’re stuck living with them. It means:
Use humane methods (exclusion, not killing).
Follow state “safe dates” and guidance when applicable.
When in doubt, call your state wildlife agency or a licensed wildlife control operator.
Quick-use template: Bat exclusion checklist (print this)
Before you start
☐ Confirm no human/pet exposure (if exposure risk, follow health department guidance)
☐ Look up your state’s bat exclusion timing guidance
☐ Do a dusk watch and mark active exits
Materials
☐ One-way exclusion device(s) Bat Exclusion Kit
☐ Exterior sealant + flashing/hardware cloth
☐ PPE (gloves + respirator + eye protection)
Exclusion steps
☐ Seal secondary gaps (leave primary exits open)
☐ Install one-way devices on active exits
☐ Leave devices in place several nights (extend if weather is stormy)
☐ Confirm no activity at dusk + no fresh guano
☐ Remove devices and seal final openings
After
☐ Clean guano safely (or hire remediation)
☐ Re-check roofline and vents for any missed gaps
FAQs (real questions people ask)
1) What’s the fastest way to get rid of bats?
If a bat is in a living space, confine it to one room and contact animal control/health department guidance if there’s any exposure risk. For an attic colony, the fastest reliable fix is humane exclusion (one-way devices) plus sealing—usually completed over several days to a couple of weeks depending on timing and weather.
2) Can I seal up my attic tonight to stop them?
Not if you want to avoid bigger problems. Sealing without one-way exits can trap bats inside and force them into walls or living spaces, or trap pups during maternity season. Humane exclusion guidance emphasizes one-way exits first, then final sealing.
3) Do bat repellents (ultrasonic, peppermint, mothballs) work?
Sometimes they change behavior temporarily, but they rarely solve the root problem: entry points and roosting preference. Conservation and wildlife guidance typically recommends exclusion over repellents for permanent results.
4) How long should I leave a one-way bat door installed?
Common guidance is multiple nights, often 5–10 days, and longer if weather is stormy because bats may not exit every night.
5) What should I do if I wake up and there’s a bat in my bedroom?
CDC guidance advises treating this as a potential exposure situation and contacting a healthcare provider/health department to determine whether rabies post-exposure prophylaxis (PEP) is needed—and not releasing the bat until public health experts advise.
6) Is it legal to remove bats from my house?
In many places, yes—but methods and timing can be regulated, and some bat species are protected. Many reputable bat resources advise checking your state wildlife agency for restrictions, especially around maternity season.
Next steps / key takeaways
If there’s any exposure risk: follow public health guidance first.
Permanent bat removal is exclusion, not repellent: one-way devices + sealing.
Timing matters: avoid trapping pups; check your state’s safe dates.
If your roofline is complex or high-risk: hiring a pro is often cheaper than fixing a DIY mistake.


Comments