How to Get Rid of Bed Bugs
- HDIGRO Team

- Feb 23
- 8 min read

How to Get Rid of Bed Bugs
Bed bugs have a special talent: they turn normal, capable adults into 2 a.m. doom-scrollers who suddenly consider throwing out a mattress, lighting a candle, and moving to a new zip code.
Take a breath. You don’t need to burn your life down.
You do need a plan—because bed bug control is not a one-and-done “spray and pray” situation. The most reliable approach is Integrated Pest Management (IPM): a mix of inspection, non-chemical tactics (heat, laundering, encasements), careful targeted treatments, and monitoring.
Below is the exact sequence I’d follow if this were my own home—plus what to buy, what to skip, and how to know you’re actually winning.
Quick disclaimer (health + safety + legal)
This guide is educational and general. If you have asthma, chemical sensitivities, infants, elderly household members, or pets, be extra cautious with any pesticide product and follow labels exactly. If you live in a rental, your landlord or local rules may require specific reporting/treatment steps. For pesticide legality/safety guidance, use official resources.
Step 0: Confirm its bed bugs (so you don’t waste money)
Before you treat anything, confirm. People commonly confuse bed bugs with fleas, mosquitoes, carpet beetles, or rash irritation.
What bed bug evidence looks like
Live bugs (apple-seed size adults; smaller nymphs)
Rust-colored spots on sheets/mattress seams (fecal marks)
Shed skins (translucent “shells”)
Eggs (tiny, pale, stuck in crevices)
CDC also notes bed bugs typically feed at night and hide in cracks near sleeping areas.
Where to inspect first (10 minutes, high payoff)
Use a bright flashlight (and a credit card to run along seams):
Mattress seams + tags + piping
Box spring edges + underside
Bed frame joints + screw holes
Headboard (behind + mounting points)
Nightstand seams + drawer corners
Baseboards and carpet edge near bed
Little-known tip from experience: If you only inspect the top of the mattress, you’ll miss them. The bed frame joints and headboard are frequent “HQ” spots.
A simple flashlight + magnifier kit helps a lot.
Step 1: Stop the spread (today, before you treat)
Your #1 goal in the first 24 hours: containment.
Do this immediately
Don’t move items room-to-room unless they’re sealed.
Put a big trash bag at the door of the infested room: everything leaving gets bagged.
If you must move linens/clothes: seal them first.
The “Clean / Dirty / Quarantine” system (simple but powerful)
Create three zones using bags or bins:
DIRTY: items to launder/heat
CLEAN: items already treated (sealed)
QUARANTINE: items you can’t treat yet
Why this matters: Most DIY failures happen because people “half treat” and accidentally seed other rooms.
Heavy-duty contractor bags + sealing tape.
Step 2: Make the bed an island (so bites stop while you work)
This is one of the fastest morale wins: isolate the bed so you can sleep and stop feeding the population.
Bed isolation checklist
Pull bed 6–8 inches away from walls
Remove bed skirt and anything touching floor
Put interceptor traps under each bed leg
Encase mattress + box spring (more on this next)
EPA specifically discusses DIY approaches and also shows how interceptor-style monitoring is used as part of control.
Bed bug interceptor cups (these are worth it).
Step 3: Hit them with heat (laundry + dryer is your best DIY weapon)
If there’s one DIY tool I trust, it’s heat—especially the clothes dryer.
Laundry protocol that works
Bag items at the source
Dump directly into washer (or straight into dryer if “dry clean only” risk is low)
Dry on high heat (many protocols recommend 20–45 minutes depending on item thickness)
After drying: seal in a “CLEAN” bag/bin
Purdue’s bed bug treatment prep guidance explicitly emphasizes dryer-on-high-heat for washable/dryable items.
Cost-saving insight: You don’t always need hot water. The dryer is the killer for many items—so even washing cold + high-heat dry can be effective in practice (always follow fabric care labels).
Large zip bags or gasket bins for “CLEAN” storage.
Step 4: Encase the mattress and box spring (don’t skip this)
Encasements do two jobs:
Trap bugs already inside (they can’t escape to bite)
Remove hiding places in seams and tufts
EPA lists encasements as a helpful non-chemical method within an IPM program.
Encasement rules
Use bed-bug-rated encasements (not generic)
Install carefully—no rips, no gaps
Keep it on for the recommended duration (often many months) because bed bugs can survive a long time without feeding
Bed bug-rated encasements.
Step 5: Vacuum like you mean it (then dispose safely)
Vacuuming won’t solve an infestation alone, but it’s a strong “population reducer.”
Where to vacuum
Mattress seams (lightly) and bed frame joints
Baseboards and carpet edges near bed
Under furniture edges, drawer seams
Cracks/crevices (use crevice tool)
After vacuuming (important)
Immediately empty vacuum contents into a sealed bag
Take it outside to trash
Clean the canister/brush roll if applicable
Common mistake: Vacuuming and leaving the canister sitting inside = “congrats, you built a bed bug bus station.”
Step 6: Choose your treatment path (DIY, pro, or hybrid)
Simple comparison table: what to pick and when
Option | Best for | Pros | Cons | My take |
DIY (IPM + careful products) | Early/small infestations, budget constraints | Lower cost, immediate action | Easy to miss hiding spots; requires discipline | Works if you follow a system—no shortcuts |
Professional chemical treatment | Moderate infestations, multi-room spread | Targeted expertise + residuals | Prep burden; multiple visits | Great if you pick a reputable pest pro |
Professional heat treatment | Heavy infestations; fast reset | Kills all life stages when done correctly | No residual effect; reinfestation possible | Powerful “reset button,” but you must prevent reintroduction |
Hybrid (heat/laundry + pro follow-up) | Most real homes | Best balance: quick knockdown + monitoring | Requires coordination | My favorite approach when feasible |
Heat treatment effectiveness depends on lethal temperatures reaching cracks/crevices; Virginia Tech notes technicians aim for high ambient temps and that hard-to-heat harborages must reach lethal thresholds.
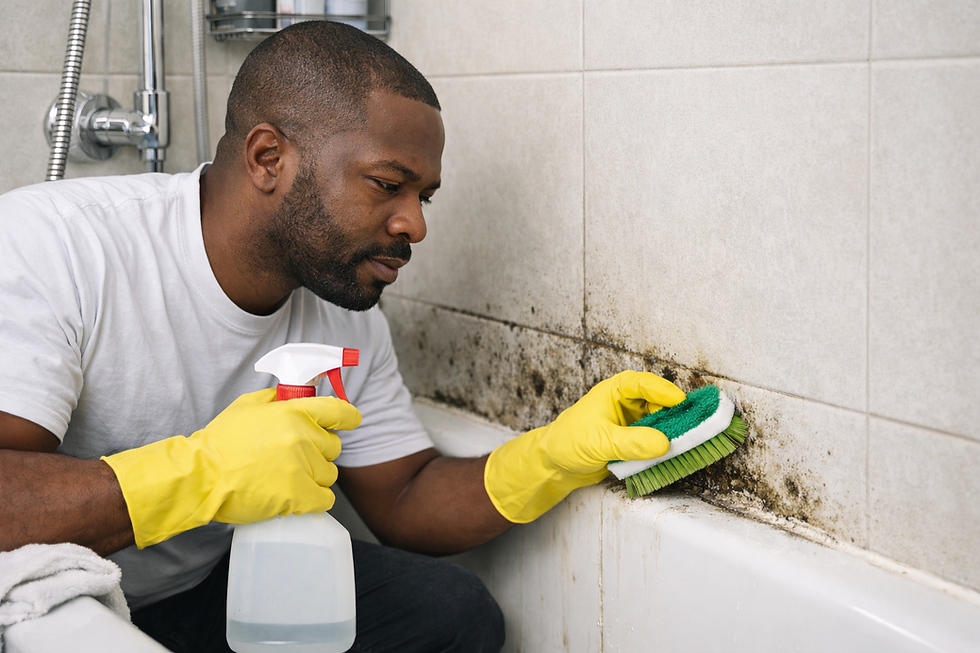
Step 7: If you DIY chemicals, do it the safe, targeted way
First: bed bugs have developed widespread resistance to common insecticides, especially pyrethroids in many populations. That’s one reason random “hardware store sprays” often disappoint.
Second: EPA warns against dangerous, ineffective treatments (like using flammables).
The DIY rule that saves money and headaches
Treat cracks and crevices, not air and open surfaces. Bed bugs hide. Spraying your mattress surface like you’re painting a fence is a classic fail.
What not to do (seriously)
EPA explicitly flags several unsafe/ineffective DIY methods, including rubbing alcohol/kerosene/gasoline due to fire and health hazards. Also: don’t try to “heat your home” with a thermostat/space heater to kill them—EPA warns this is dangerous and doesn’t work as DIY.
Safer DIY priorities (high level)
Focus on non-chemical kills first (dryer, vacuum, encase, isolate)
If using a registered product, follow label instructions exactly
Keep kids/pets away during and after treatment per label
Desiccant dust applicator Always read the label and confirm legality for your state.)
Step 8: Monitoring and re-treatment schedule (this is where you actually win)
Here’s the truth: bed bug elimination is a process, not an event.
A practical timeline (DIY-friendly)
Day 1–2
Confirm + contain
Bed isolation + interceptors
Laundry/dryer blitz
Encase + vacuum
Day 3–7
Treat cracks/crevices (or first pro visit)
Reduce clutter (bag + quarantine)
Week 2
Re-inspect interceptors
Repeat targeted treatment where activity is found
Week 3–6
Continue weekly monitoring
You’re aiming for no bites + no interceptor catches + no new signs
Why it takes weeks: eggs/hiders/survivors. Monitoring keeps you from declaring victory too early.
Troubleshooting flow: “If you see X, do Y”
Use this like a decision tree when you feel stuck:
If you’re still getting bites after 7–10 days…
Confirm bed isolation (nothing touching walls/floor)
Check interceptors for activity
Inspect headboard/bed frame again
Expand inspection radius (couch, baseboards, nearby furniture)
If interceptors are catching bugs but numbers aren’t dropping…
You may have a nearby harborage you haven’t treated (headboard, nightstand, baseboard gaps)
Increase vacuuming + crack/crevice targeting
Consider professional assessment (they often find hiding spots you’d never guess)
If you live in an apartment/duplex and they keep returning…
This is often a building-wide issue
Document everything
Ask about coordinated treatment (neighboring units)
Review relevant regulations/guidance for your housing situation
If you used “bug bombs” and it got worse…
Foggers often drive bed bugs deeper into walls and hiding places
Reset to IPM: isolate + heat/laundry + targeted crevice treatment + monitoring
Bed bug bites: what to do (and when to call a clinician)
Most bites don’t require medical treatment, but itching can be miserable.
CDC notes typical care is symptomatic—avoid scratching, use topical products for itch; clinicians may recommend antihistamines or topical steroids in more severe cases.
Call a clinician if you have:
Signs of infection (spreading redness, warmth, pus)
Severe allergic reaction symptoms
Significant swelling or systemic symptoms
The “Don’t Waste Money” list (common scams + mistakes)
If you remember nothing else, remember this: bed bugs punish chaos.
The biggest mistakes I see
Treating before containing (you spread them)
Moving furniture/linens unbagged (you seed other rooms)
Buying random sprays without a plan (resistance + poor targeting)
Skipping encasements and interceptors (you can’t measure progress)
Declaring victory too early (then they “mysteriously” return)
Quick “Get Rid of Bed Bugs” checklist (copy/paste)
Today (first 24 hours)
Confirm signs in mattress seams/bed frame/headboard
Bag items before moving them
Start DIRTY/CLEAN/QUARANTINE system
Isolate bed + install interceptors
Dry bedding/clothes on high heat, seal as CLEAN
This week
Encase mattress + box spring
Vacuum harborages; dispose vacuum contents safely
Reduce clutter (bag + quarantine)
Target cracks/crevices (or schedule pro)
Next 2–6 weeks
Weekly inspections + interceptor checks
Re-treat targeted areas if activity continues
Keep CLEAN items sealed until confident
FAQs (real questions people ask at 2 a.m.)
1) Can I get rid of bed bugs myself, or do I need an exterminator?
You can DIY small infestations if you’re disciplined with IPM—laundry/heat, encasements, isolation, targeted treatment, and monitoring. EPA emphasizes bed bug control is complex and recommends an IPM approach. If it’s multiple rooms, recurring, or in a multi-unit building, pros often save time and reduce reinfestation risk.
2) Do bed bugs mean my house is dirty?
No. Bed bugs aren’t a “cleanliness” issue—they’re hitchhikers. Clutter can make them harder to eliminate, but cleanliness doesn’t prevent them by itself. (This is one reason hotels and spotless homes still get them.)
3) What kills bed bugs instantly?
Direct heat can kill them quickly—the dryer on high heat is one of the most practical at-home killers for fabrics. For whole-room instant results, professional heat treatment can work well when lethal temperatures reach harborages.
4) Why do I still see bed bugs after I sprayed?
Common reasons:
Spray didn’t reach cracks/crevices where they hide
Resistance to certain insecticides is common in many populations
You’re seeing newly emerged bugs or survivors because monitoring/timeline wasn’t long enough
5) Are rubbing alcohol and DIY “home sprays” safe and effective?
EPA warns against using rubbing alcohol, kerosene, or gasoline—they can be dangerous and can ignite. Some DIY methods can help (dryer heat, encasements, interceptors), but “spray everything” home remedies are often inconsistent.
6) How long does it take to fully get rid of bed bugs?
If you do this correctly, many homes see major improvement within days—but full elimination often takes weeks because you need repeated inspections and follow-ups. A realistic window is 2–6 weeks, sometimes longer depending on severity and whether neighbors/other rooms are involved.
Next Steps / Key Takeaways
Don’t start with chemicals. Start with containment + heat.
Make the bed an island (encase + interceptors + nothing touching floor/walls).
Follow an IPM sequence—random actions waste money and spread bugs.
Monitor for weeks, not days, and treat again where activity persists.
If you’re in a multi-unit building or it keeps coming back, coordinate treatment and document steps; regulations/guidance may apply.


Comments